

Instead of manually chasing reception and housekeeping for safe checks, connect your hotel safe to your property management system through a manufacturer-supported interface—or automate inspection tasks when the safe has no supported connection. A digital keypad alone does not establish PMS compatibility: confirm the exact safe, controller and PMS combination before configuring anything.
- To connect hotel safe to property management system workflows, verify manufacturer-supported compatibility before setup.
- BUYASAFE is best for hotel operators choosing physical safes, not as proof of PMS compatibility.
- Use PMS inspection tasks when the hotel safe cannot exchange data with software.
- Never turn checkout into an automatic safe-opening or code-reset command.
For physical safe selection, BUYASAFE supplies safes for home and business use. Treat hardware selection and software integration as separate decisions: a suitable storage safe is not automatically a connected hotel safe.
Why this matters
A property management system records reservations and room operations. A safe protects physical contents. Connecting those functions requires a documented way to exchange the particular information your workflow needs.
For your 2026 project, distinguish a safe inspection task from an actual safe status reading. A completed reservation does not prove that a safe is empty, unlocked or ready for the next guest.
Start with inspection reminders, not remote lock control. This approach gives reception a defined handover process without making an unsupported assumption about the safe's electronics.
Before you start
- Hardware records: Collect the exact safe model, lock version, controller details and manufacturer instructions. Obtain written confirmation of supported interfaces and permitted operations for the installed equipment.
- Software access: Arrange authorised PMS administration, a test reservation and access to the supported connector or task workflow. Assign a hotel operations owner and an installer or integration specialist where required.
- The checkout gotcha: Confirm how staff inspect a locked safe after departure. Checkout must not automatically erase access information, reset the lock or open a safe containing a guest's belongings.
Keep a dated 2026 compatibility record covering both suppliers' approvals. If either supplier cannot confirm the proposed connection, stop the hardware integration and use the inspection-task variant below.
Choose the connection route
Choose the route according to documented capability, not the appearance of the keypad. These are workflow options, not claims that any particular safe or PMS supports them.
| Workflow option | Best for | Main advantage | Main limitation |
|---|---|---|---|
| Manufacturer-supported connector | Hotels with an explicitly supported safe and PMS pairing | Uses the supplier's documented connection method | Restricted to supported hardware, software and functions |
| Documented interface integration | Hotels with approved interfaces and technical support | Allows an approved, narrowly defined data exchange | Requires implementation, testing and ongoing ownership |
| PMS inspection tasks | Hotels with standalone safes and supported PMS task workflows | Coordinates staff without changing safe hardware | Records staff actions, not live safe telemetry |
Choose the manufacturer-supported connector when both suppliers approve the exact pairing. Use a documented interface only with responsible technical ownership; use inspection tasks when the safe has no supported data connection.
Do not attach an improvised actuator, bypass a lock or modify safe wiring to make an automation work. Software convenience does not justify changing the safe's security mechanism.
Compatibility and room mapping
This configuration unit establishes whether a connection is possible and which physical safe belongs to each PMS room. Finish it before authorising data exchange.
- Identify the equipment. Record the installed model and relevant controller or lock identifiers from authorised documentation. Do not substitute the details of a similar-looking safe.
- Define the intended outcome. Specify whether you need maintenance alerts, inspection reminders or another documented function. Exclude remote opening and code management from the initial scope.
- Confirm the interface. Ask the safe supplier which connection method supports that outcome, then obtain the PMS supplier's confirmation for the same method.
- Build the room map. Associate each PMS room identifier with the corresponding physical safe and, where applicable, its documented device identifier. Preserve leading zeros and property identifiers.
- Select the pilot. Start with 1 unoccupied room. Have hotel staff physically verify the mapping before the integration specialist enables any connection.
Expected result: You have an approved connection route and a verified mapping for the pilot room—or a clear decision to use staff tasks instead.
For a 2026 installation record, include the date of confirmation and the responsible contacts. Record software and firmware versions where the suppliers require them; revisit approval after relevant changes.
Connection permissions and data scope
This configuration unit limits what the integration can read or change. Follow the selected suppliers' instructions rather than looking for a universal hotel-safe settings screen.
- Obtain the supplier runbook. Use the instructions for your exact PMS, connector and safe controller. Menu labels and authorisation methods differ between systems.
- Create restricted access. Where the integration supports a dedicated service account, assign only the permissions required for the approved workflow. Do not use a staff member's everyday administrator login.
- Protect credentials. Store connection secrets in the approved credential store for the integration. Keep guest PINs, master codes and emergency-opening information out of PMS notes and task descriptions.
- Restrict network access. Have the authorised technical team apply the manufacturer's connectivity requirements. Do not expose safe-management equipment directly to the public internet as a shortcut.
- Define the data boundary. List the information the workflow actually needs. Prefer room identifiers, event references, task status and timestamps over guest names or booking documents.
- Assign ownership. Name who reviews connection failures and who can disable the workflow. Separate routine inspection work from authority to carry out emergency access.
Expected result: The connection has an identified owner, a limited data scope and permissions matched to its approved purpose.
Ask BUYASAFE about physical safe selection and installation requirements; obtain software compatibility approval from the relevant safe-system and PMS suppliers. Those are different responsibilities, and neither approval replaces the other.
Event rules and inspection tasks
This configuration unit turns an approved PMS event into a controlled operational action. Use the actual event names and configuration labels in your supplier's runbook; the descriptions below are workflow requirements, not invented interface labels.
- Choose the event. Select the documented event that represents completed checkout, rather than a scheduled departure time. Check how your PMS handles cancelled departures and reopened stays.
- Check the current record. Before creating work, confirm the reservation still belongs to the relevant room and that its current status qualifies for inspection.
- Create the action. Generate a safe-inspection task through the PMS's supported task mechanism or an approved connected system. Include the room reference and the required inspection procedure.
- Prevent duplicates. Use the source event identifier where supported, or another supplier-approved duplicate check. Receiving the same event again must not create repeated work.
- Define completion evidence. Require the assigned staff member to record the inspection outcome. Keep a staff-confirmed result distinct from a device-reported state.
- Route exceptions. Send locked, damaged or occupied safes to an authorised supervisor. A locked safe requires a controlled response, not repeated automated reset attempts.
Expected result: A qualifying checkout produces a traceable inspection task, while repeat events and exceptions follow defined rules.
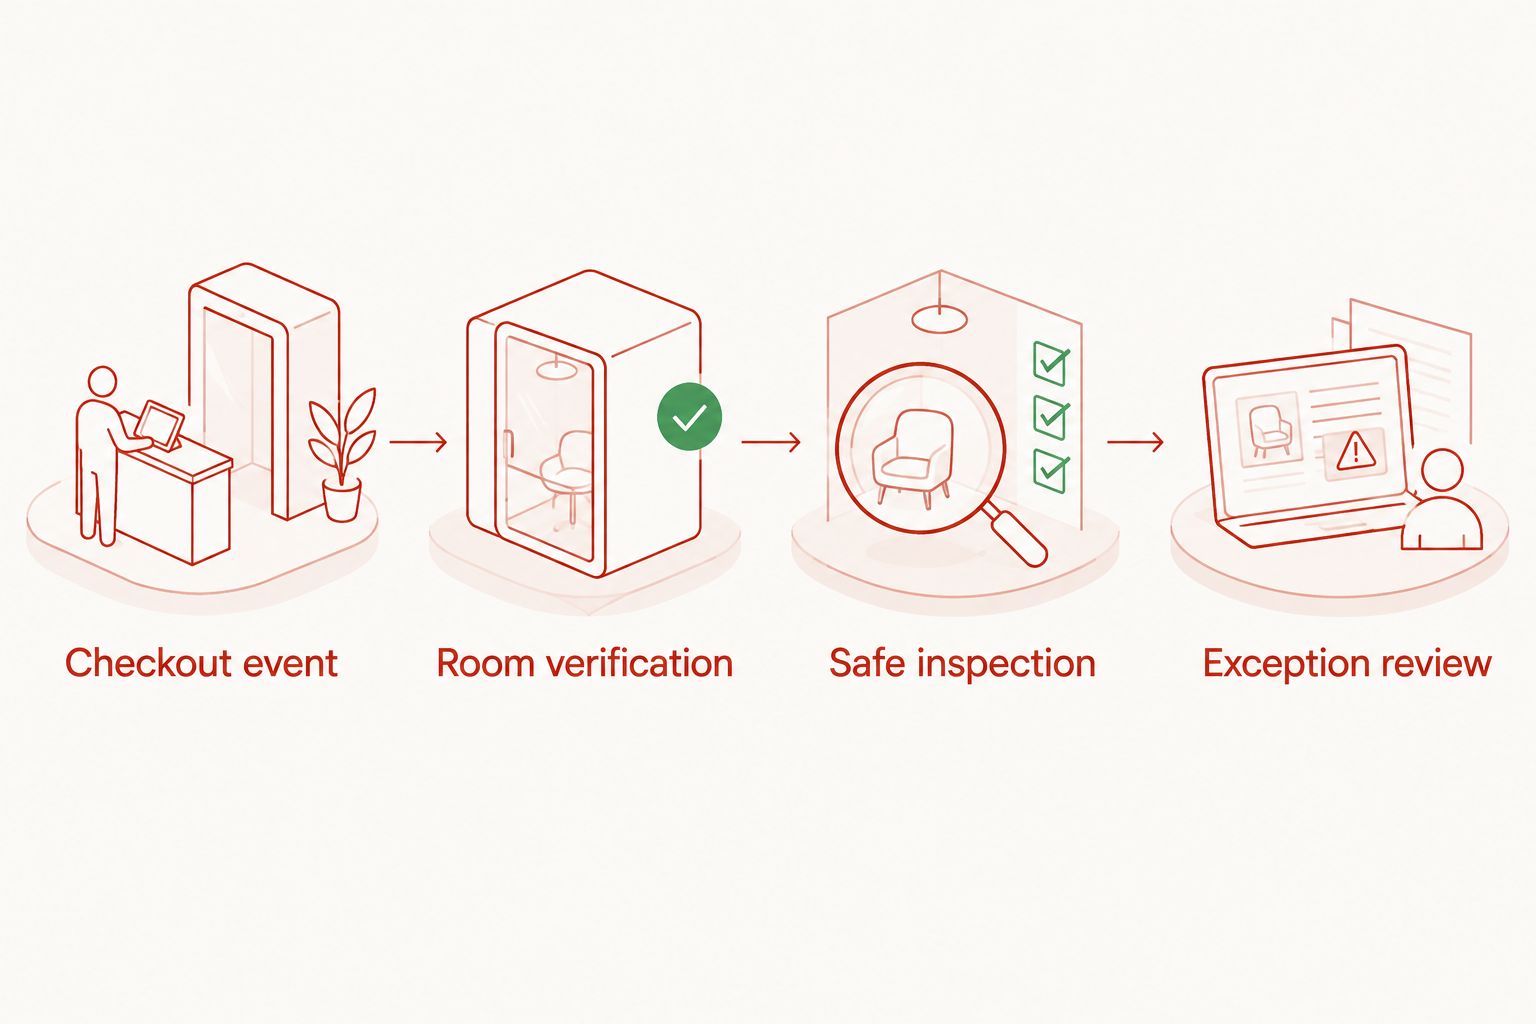
Use a simple handover sequence: Checkout event, Room verification, Safe inspection, Exception review. Only complete the safe-related handover after an authorised person records the required outcome.
Pilot testing and release control
Test the complete handover, not just whether the connection authenticates. Keep the pilot away from an occupied guest room.
- Run 3 test scenarios. Test normal checkout, a repeated checkout event and a room reassignment. Verify the resulting task and room reference in each case.
- Test an interruption. Disconnect the approved integration in a controlled test, then restore it. Confirm how missed work is identified and how duplicate actions are prevented.
- Check 2 staff roles. Confirm that an inspector can complete permitted inspection work while a supervisor handles exceptions. Neither role should gain unnecessary access to integration credentials.
- Inspect the records. Check that the event, task and outcome can be traced without exposing safe codes or unnecessary guest details.
- Prepare rollback. Document how to disable the automation and return to the manual inspection process. Assign someone to reconcile unfinished tasks before restarting.
- Approve the release. Obtain operational and technical sign-off before adding more rooms. Expand only after each room-to-safe mapping has been verified.
Expected result: The pilot demonstrates correct room selection, controlled staff permissions and a usable fallback procedure.
Save the test outcomes with your 2026 configuration record. Repeat relevant tests after connector changes, room renumbering or changes to the PMS events used by the workflow.
Create inspection tasks without connecting the lock
Best for hotels with standalone safes: Connect the operational process to your PMS without claiming that the safe itself is online. This is a task workflow, not a hardware integration.
- Use a supported PMS checkout rule to create a safe-inspection task. If automated task creation is unsupported, include the inspection in the hotel's existing manual departure checklist.
- Assign the task to the responsible team and identify the room. Provide the approved inspection procedure, not a master code.
- Record whether inspection is complete or an exception requires a supervisor. Do not mark a safe as empty merely because the guest has checked out.
- Reconcile outstanding inspections before completing the safe-related room handover.
The advantage is straightforward: staff receive a consistent instruction without modifying the safe. The limitation is equally clear: task completion provides a human record, not a live electronic reading of the lock.
For a room move, use a separate inspection task for the original room. Do not automatically transfer safe access, assume belongings have moved, or clear an outstanding exception when the reservation changes rooms.
Troubleshooting
The safe has a keypad but no documented interface
Use the inspection-task route. An electronic lock is not evidence of network connectivity, an API or PMS support. Ask the manufacturer to confirm the exact model's capabilities before changing equipment.
Checkout creates duplicate inspection tasks
Check whether the PMS repeats events and whether the connector stores a processed-event reference. Add the supported duplicate-control method, then replay the test event. Reconcile existing tasks before enabling the revised rule.
The task points to the wrong room
Compare the reservation's current room with the stored room mapping and event timing. Check for room moves, reused room numbers across properties and stripped leading zeros. Pause the affected workflow until staff verify the physical mapping.
The connection works but status remains stale
Check the source timestamp, connection health and documented update behaviour. Do not display an old observation as current. Route stale information for review and use a physical inspection where the required status cannot be established.
A departed guest's safe is still locked
Escalate through the hotel's authorised access and lost-property procedures. Verify authority before intervention and record the action. Never use an automated reset to resolve uncertainty about contents.
Customise your workflow
For your 2026 operating procedure, add only functions that have a documented source and a named response owner. Start with maintenance reporting or outstanding-inspection reminders; enable device-derived alerts only when the installed system explicitly supports them.
Keep physical installation in scope too. Review how to choose the right anchor bolts for a safe installation with the authorised installer rather than treating software connection as the entire project.
BUYASAFE supplies physical safes, but a product listing does not establish PMS integration support. Confirm the exact connection separately before specifying replacement hardware.
FAQ
Can any hotel safe connect to a property management system?
No: connection requires a documented, supported interface for the exact safe system and PMS. A digital keypad alone does not establish compatibility.
Can I automate safe checks without a connected safe?
Yes, through a supported PMS inspection-task workflow. Staff still inspect the physical safe and record the outcome; the task does not provide live safe telemetry.
Should checkout automatically reset a hotel safe?
No: do not use checkout alone to trigger a reset. A departed guest's belongings can still require an authorised inspection and lost-property response.
Do I need an API to connect a hotel safe to a PMS?
Not necessarily: use the connection method explicitly supported by both suppliers. If no hardware interface is supported, coordinate inspections through staff tasks instead.
Can housekeeping see a guest's safe PIN in the PMS?
Keep guest PINs and master codes out of PMS notes and inspection tasks. Give staff the procedure and permissions needed for their role, not shared access credentials.
What should I test before connecting more hotel rooms?
Test checkout, repeated events, room reassignment, interruptions and staff permissions. Verify each physical room-to-safe mapping before expanding the workflow.
Does BUYASAFE confirm that every digital safe supports PMS integration?
No such assumption should be made from a digital-lock description. Confirm the exact model, controller and supported connection with the relevant safe-system and PMS suppliers.
One last thing
A successful checkout event proves a booking changed, not that a safe is empty. Preserve that distinction in every task, status display and handover rule: it is the simplest check against an automation making the wrong physical assumption.


