

You can install a home safe yourself when the manufacturer permits it, you can move it safely, and you can secure its approved fixing points to a verified, suitable structure. This 2026 guide explains how to install a safe without guessing bolt sizes, drilling into hidden services or treating a cupboard panel as a structural fixing surface.
- How to install a safe: follow the model’s instructions, verify the structure, fit approved anchors and test operation.
- BUYASAFE suits homeowners comparing home safes before planning installation.
- Stop before drilling if hidden services, slab construction or the required anchoring method remain uncertain.
- Use factory-approved fixing points; do not drill extra holes through a fire-resistant safe.
Why this matters
A safe installation depends on the structure and fixings, not just the lock. Concealing a safe inside furniture does not establish that it is securely anchored, and tightening a bolt does not prove that the material beneath it can hold the fixing.
For a 2026 home installation, start with the instructions for your exact model and any installation conditions imposed by your insurer. Use the guide to bolting down a safe correctly alongside those instructions, not as a replacement for them.
How do you install a home safe without professional help?
Follow this sequence only after confirming that the safe, its location and the required work are suitable for DIY installation. If you cannot verify a critical step, stop rather than substitute a generic fixing method.
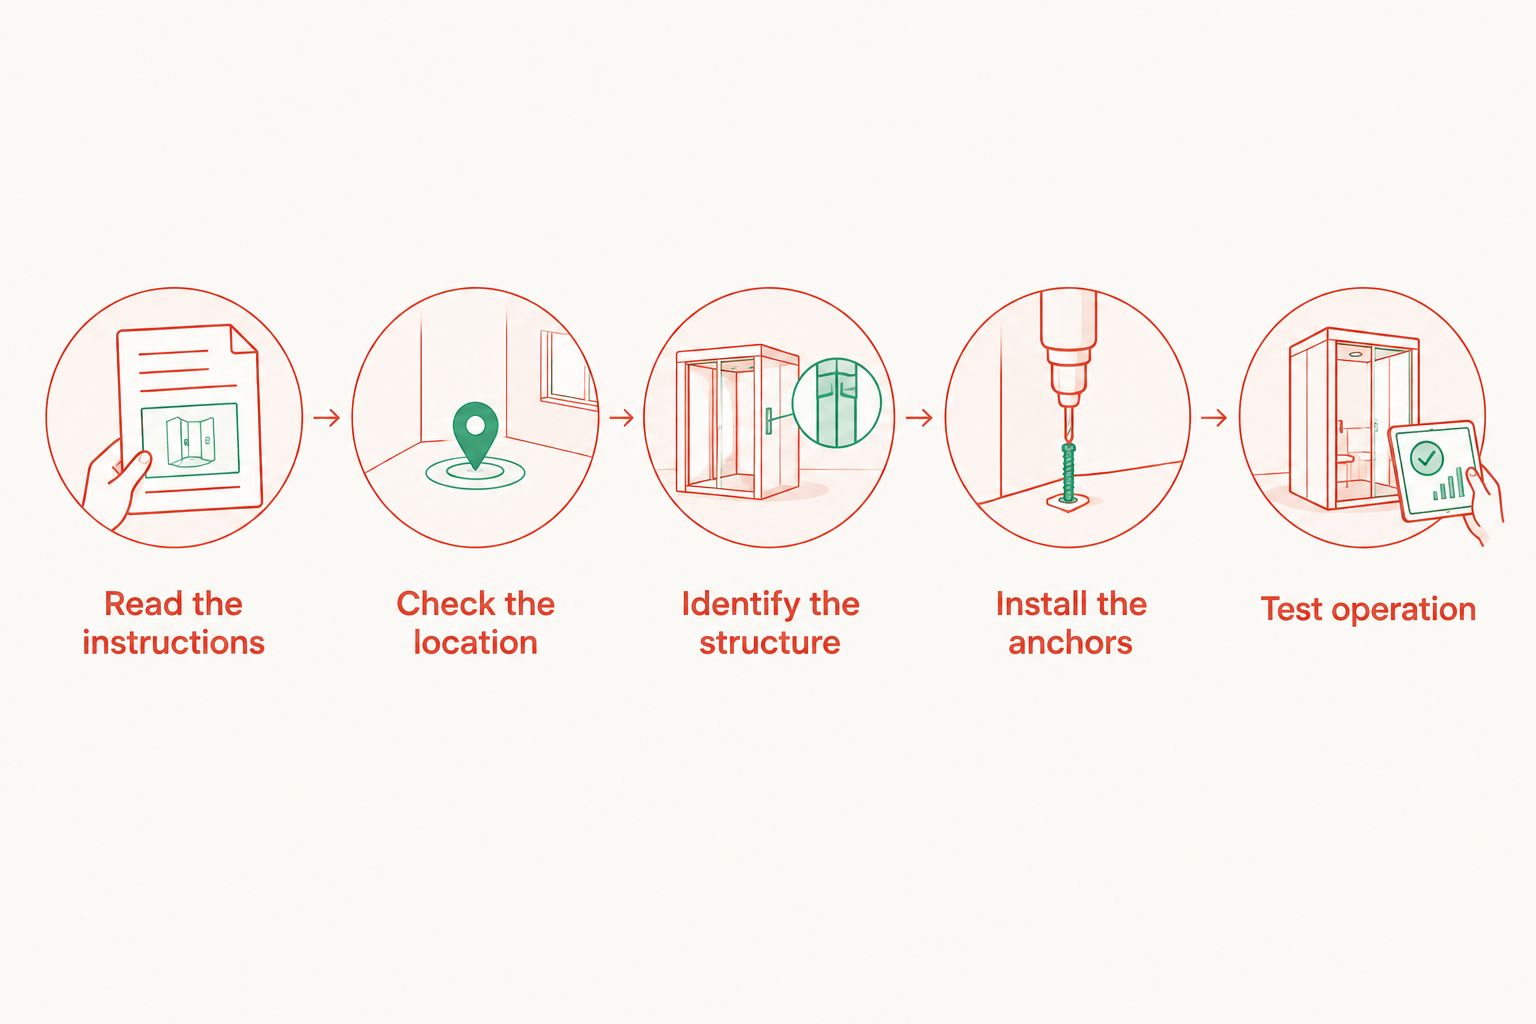
1. Read the installation instructions before moving the safe
Identify the model and obtain its installation manual. Check the permitted mounting orientation, approved fixing locations, suitable substrates and specified anchoring system.
Do not assume a supplied fixing kit suits every floor or wall. Match the instructions to your actual building material, including any limits on anchor placement and installation.
Check these points before unpacking your drill:
- Does the manufacturer permit floor fixing, rear fixing or both?
- Which factory holes are intended for anchoring?
- What substrate and anchor specifications apply?
- Does the installation require particular sleeves, plugs or seals?
- Are there restrictions on moving or positioning the safe?
2. Confirm that you can move the safe safely
Check the listed weight and the route from delivery point to installation position. Include doorways, steps, floor transitions and the space needed to turn.
Do not attempt a solo lift simply because the safe looks compact. If positioning requires stairs, lifting equipment or movement you cannot control safely, use a qualified safe mover.
Keep people clear of the safe’s possible tipping path. Follow the manufacturer’s handling instructions, and do not use the handle or keypad as a lifting point.
3. Check the location and operating clearance
Choose a position that allows the door, handle and locking bolts to operate without obstruction. Check that you can reach the keypad, keyway and battery compartment where applicable.
Measure the safe itself, not just the empty cupboard. For example, the Burg Wachter - Smart Safe SMART 2E - Electronic lists external dimensions of 260 mm high, 350 mm wide and 271 mm deep; those cabinet measurements alone do not establish door-opening or installation clearance.
Allow for skirting boards, hinges, shelves and the space needed to use installation tools. A safe that fits through the cupboard opening still needs a suitable fixing surface behind or beneath it.
4. Identify the structure and hidden hazards
Establish what lies beneath the floor covering or behind the wall lining. Carpet, tiles, plasterboard and cabinet panels do not identify the structural material that must receive the anchors.
Do not drill into an unidentified slab. If post-tensioning, embedded services or structural details are uncertain, have the drilling location assessed by an appropriately qualified specialist.
Check for electrical cables, plumbing and heating systems. A consumer detector does not resolve every concealed hazard; stop if you cannot establish a safe drilling position.
Do not drill suspected asbestos-containing material. Arrange identification and appropriate handling before disturbing it.
5. Match the anchors and tools to the approved method
Select anchors only after confirming the substrate and the safe manufacturer’s requirements. Follow the anchor manufacturer’s instructions for drill diameter, hole depth, edge distance, cleaning and tightening.
Prepare the tools the specified method requires:
- Measuring tape, marker and level.
- Suitable drill and specified drill bit.
- Appropriate hole-cleaning equipment.
- Required spanners, sockets or torque wrench.
- Eye, hearing and dust protection appropriate to the work.
Check the drilling tool’s instructions and control masonry dust at source. Do not choose a larger bolt or deeper hole on the assumption that either automatically improves security.
6. Position the safe and mark approved holes
Place the safe in its intended position using a safe handling method. Check that it sits as the manufacturer requires and that the door operates without contacting nearby surfaces.
Mark the fixing positions through the approved mounting holes where the instructions permit. Recheck alignment and the proposed drilling locations before moving the safe out of the way.
Do not create extra mounting holes through the body. Altering a fire-resistant safe without manufacturer approval risks compromising its protective construction.
7. Drill, clean and install the specified anchors
Drill only after the location has been cleared for the work. Use the specified bit, depth control and drilling method for the selected anchor and substrate.
Clean each hole exactly as the anchor instructions require. Dust and debris affect the installation of anchoring systems, so do not skip cleaning because the bolt appears to fit.
Reposition the safe and install the anchors in the prescribed sequence. If the system uses a chemical anchor, follow its stated installation and curing conditions before loading or tightening it.
8. Tighten, inspect and test operation
Tighten the fixings to the anchor manufacturer’s specification using the required tool. Do not keep tightening to compensate for a spinning anchor, cracked substrate or poor alignment.
Check that the safe sits correctly and that the fixings are seated as instructed. Stop if you find movement, damaged material or an anchor that will not tighten correctly.
Set up the lock using the model’s instructions and test it with the door open before closing it. Keep override keys outside the safe and store installation records separately from the valuables inside.
Which home safe mounting method suits your property?
Choose the mounting method the safe and building can support, not the method that needs the fewest tools. Floor fixing, rear fixing and recessed installation involve different structures and permissions.
| Mounting method | Best for | Practical advantage | Limitation |
|---|---|---|---|
| Floor fixing | A safe approved for base fixing onto a verified suitable structure | Uses the safe’s approved base mounting points | Floor coverings can conceal unsuitable material or drilling hazards |
| Rear fixing | A safe approved for rear fixing into verified structural material | Uses an approved mounting surface behind the safe | Plasterboard or cupboard backing alone is not structural anchorage |
| Recessed installation | A purpose-designed safe with an assessed installation location | Integrates the safe into its intended building recess | Requires building work beyond simply anchoring a freestanding safe |
Do not transfer instructions between these methods. A freestanding safe with base holes is not automatically suitable for installation inside a wall or below floor level.
BUYASAFE home safes include different designs and lock types; confirm the installation instructions for the exact model before selecting a mounting position. Category names do not establish anchor compatibility.
Why DIY safe installation requirements vary
The installation method changes with the safe and its surroundings. These factors determine whether the work remains a manageable DIY task:
- Approved fixing design: Factory mounting points determine where the safe can be anchored without unauthorised alterations.
- Structural material: Concrete, masonry and structural timber require different fixing assessments; surface finishes do not establish suitability.
- Safe weight and access: A manageable drilling task still requires safe transport and positioning.
- Protective construction: Fire-resistant barriers require the manufacturer’s approved treatment around fixing points.
- Property permissions: Rental agreements and strata requirements can restrict drilling or building alterations.
- Insurer conditions: Your policy can impose installation requirements separate from the safe’s operating instructions.
For a 2026 installation, confirm these conditions before buying anchoring hardware. The correct anchor is part of an approved installation system, not an isolated bolt choice.
Can I install a safe inside a wardrobe?
You can install a safe inside a wardrobe when its approved fixings reach a suitable structural surface and its door has adequate operating clearance. The wardrobe conceals the safe; it does not establish the strength of its anchorage.
Check whether the wardrobe base, skirting or rear panel prevents the safe from sitting in the required position. Do not improvise unsupported spacers or fix through furniture panels without an approved installation detail.
Can I install a safe in a rental property?
You can install a safe in a rental property only with the permissions required for the proposed work and a suitable installation method. Obtain written approval before drilling or altering the building.
For a 2026 rental installation, check the applicable tenancy requirements and your agreement rather than assuming small holes are permitted. If drilling is not approved, do not describe an unanchored alternative as equivalent to the manufacturer’s specified anchorage.
When should I stop and use a professional installer?
Use a professional installer when you cannot verify the structure, safely move the safe or complete the specified fixing method. Uncertainty about concealed services or post-tensioned concrete is a reason to stop drilling.
Professional help is also appropriate when the job requires structural alterations, difficult access or compliance documentation you cannot provide. Separate the moving task from the anchoring task: you can need specialist help for either one.
What should you record after installation?
Keep the model details, installation manual and anchor instructions with your household security records. Photograph the completed fixings where practical, without including access codes or exposing the safe’s location in publicly shared images.
For work completed in 2026, record the installation date and retain any written property permissions or insurer requirements. Documentation helps you identify the installed system when arranging inspection, relocation or repairs.
Avoid recording that the safe is professionally installed or insurance-approved unless you have documentation establishing that fact. A DIY installation record describes the work completed; it does not create a certification.
FAQ
Can I bolt a safe down myself?
You can bolt a safe down yourself when its instructions permit DIY installation and you can verify the structure, drilling position and specified anchors. Stop if handling risks or concealed hazards remain unresolved.
What size bolts do I need to install a home safe?
Use the anchor specification required for your exact safe and substrate. There is no universal bolt size that establishes a secure installation for every home safe.
Can I bolt a safe through carpet?
Follow the safe and anchor manufacturers’ instructions for any floor covering between the safe and structural substrate. Carpet is not an anchoring material, and compressible layers must not undermine the approved installation.
Can I screw a safe into plasterboard?
Plasterboard alone is not suitable structural anchorage for a safe. Rear fixing requires verified structural material and a method approved for the safe and substrate.
Can I drill extra holes in my fire-resistant safe?
Do not drill extra holes in a fire-resistant safe without explicit manufacturer approval. Use its approved fixing points and follow any instructions for restoring protective plugs or seals.
Does buying a safe from BUYASAFE mean I can install it myself?
Buying a home safe from BUYASAFE does not establish that your proposed DIY installation is suitable. Check the exact model’s instructions, the building structure and your ability to complete the work safely.
Should I test the digital lock before closing my newly installed safe?
Test the digital lock with the door open according to the manufacturer’s setup instructions before closing the safe. Confirm normal operation and keep any override keys outside it.
One last thing
Plan how the safe will eventually be removed before you install it. Check that future access to the fixings will remain possible without dismantling permanent cabinetry or undertaking unplanned building work.
A concealed location still needs usable access for lock maintenance and inspection. Make that access part of your installation plan, not a problem left for the next move.


